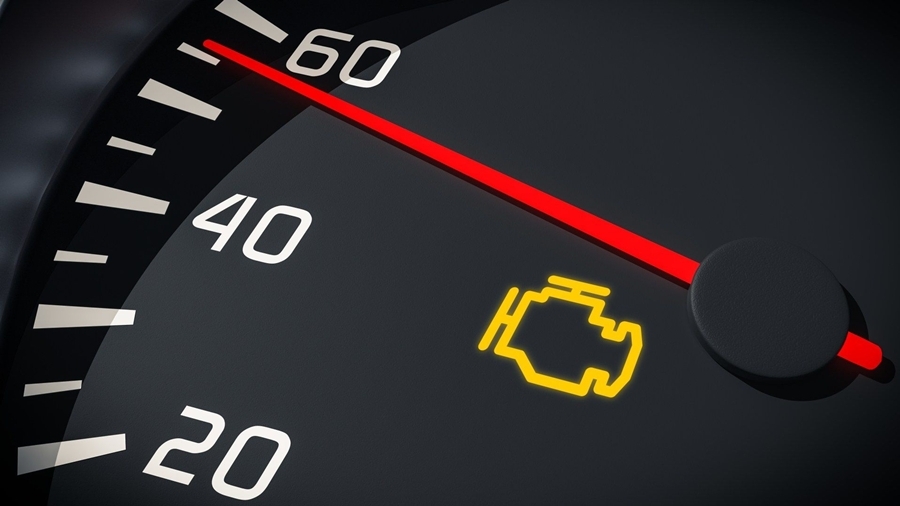
Imagine cruising down the highway when suddenly, your engine light blinks ominously, hinting at a potential coolant leak inside engine. This scenario is not just a minor inconvenience; it poses a serious threat to your engine’s health and performance.
Diagnosing and fixing a coolant leak inside engine inside your engine can seem daunting, but uncovering the mystery is easier than you think. In this article, we’ll guide you through the telltale signs of a coolant leak inside engine, the diagnostic steps to pinpoint the issue, and effective repair methods to restore your engine’s functionality.
Table of Contents
Whether you’re a seasoned DIYer or a concerned car owner, our comprehensive approach will empower you to tackle this problem head-on. Don’t let a coolant leak inside engine derail your driving experience; let’s dive in and equip you with the knowledge and confidence to diagnose and fix the issue before it leads to more significant damage!
Also read: Check Engine Light Diagnosis: Essential 6-Step Guide
Understanding Coolant Leaks: Causes and Consequences
Coolant leaks are a common yet critical issue that can affect any vehicle, leading to serious engine problems if not addressed promptly. Coolant, also known as antifreeze, is essential for regulating the engine’s temperature, preventing it from overheating or freezing in extreme weather conditions. A leak in the coolant system can disrupt this balance, causing the engine to run hotter than normal or, in some cases, overheat completely. Understanding the root causes of coolant leaks is the first step toward diagnosing and fixing the problem.

One of the primary causes of coolant leak inside engine is the deterioration of hoses and seals over time. Engine vibration, thermal expansion, and the natural aging process can cause these components to crack or become brittle, leading to leaks. Additionally, the coolant itself can become corrosive if not changed regularly, contributing to the degradation of the system’s components. Another common cause is damage to the radiator or water pump, both of which play crucial roles in the circulation of coolant throughout the engine.
The consequences of ignoring a coolant leak inside engine can be severe. An unchecked leak can lead to engine overheating, which can cause significant damage to the engine block, cylinder heads, and other critical components. In the worst-case scenario, a prolonged coolant leak inside engine can result in a blown head gasket or even a seized engine, both of which require extensive and costly repairs. Therefore, it’s vital to address any signs of a coolant leak inside engine promptly to avoid these potentially catastrophic outcomes.
Signs and Symptoms of a Coolant Leak Inside Engine
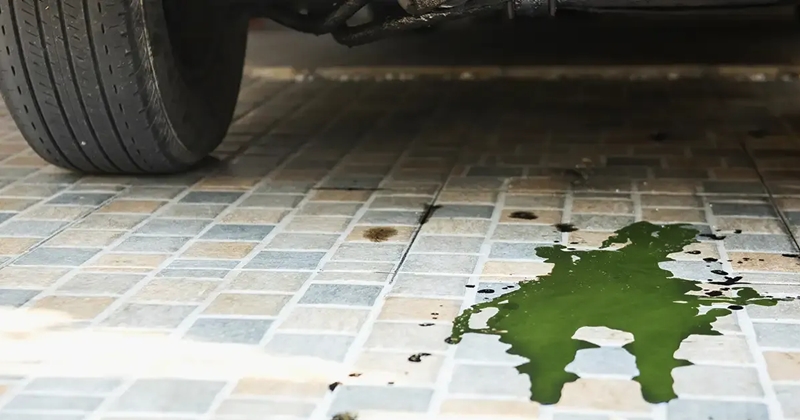
Recognizing the signs and symptoms of a coolant leak inside engine early can save you from major headaches down the road. One of the most obvious indicators is a visible puddle of coolant under your vehicle. Coolant is typically a bright green, orange, or pink fluid, and spotting it on the ground where you park can be a clear sign that something is amiss. However, not all leaks are external and easily visible, so it’s important to be aware of other symptoms as well.
Coolant Warning Light
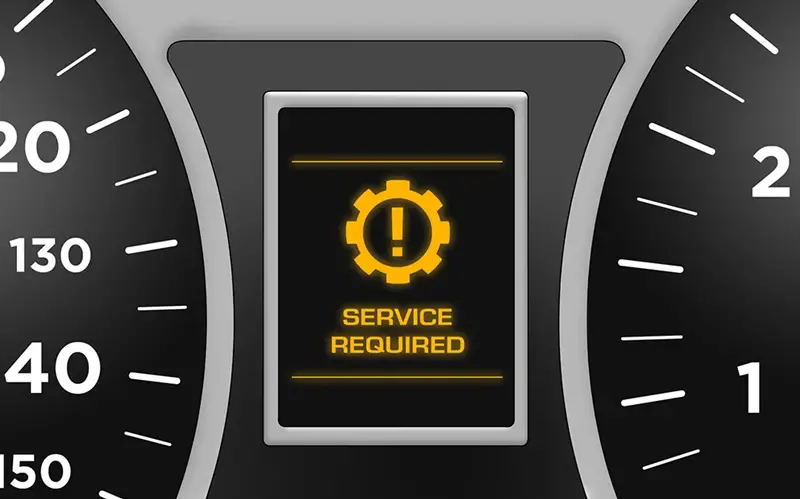
Another telltale sign of a coolant leak inside engine is a low coolant warning light on your dashboard. Modern vehicles are equipped with sensors that monitor coolant levels and alert you when they drop below a certain threshold. If this light comes on, it’s crucial to check your coolant level and inspect for potential leaks. Additionally, an overheating engine is a strong indicator of a coolant leak inside engine. If you notice your temperature gauge rising above the normal range or see steam coming from under the hood, it’s a sign that your engine is not receiving adequate cooling.
You might also notice a sweet, syrupy smell coming from your engine bay, which is the scent of leaking coolant. In some cases, the coolant may leak into the engine oil, leading to a milky appearance in the oil. This is a serious issue that requires immediate attention, as it can indicate a blown head gasket or other major engine problems. Pay attention to these signs and symptoms, as they can help you diagnose a coolant leak inside engine before it causes significant damage to your engine.
Tools Required for Diagnosing Coolant Leak Inside Engine
Diagnosing a coolant leak inside engine requires a few essential tools that can help you pinpoint the source of the problem. Having the right tools on hand will make the process smoother and more efficient, allowing you to identify and fix the leak with confidence. One of the most important tools you’ll need is a cooling system pressure tester. This tool allows you to pressurize the cooling system and check for leaks without the engine running, making it easier to spot the source of the leak.
Necessary Tools: Flashlight And Mirrors
A good set of automotive inspection mirrors and a flashlight are also invaluable when diagnosing coolant leak inside engine. These tools will help you see into hard-to-reach areas of the engine bay where leaks may be hiding. Additionally, having a set of basic hand tools, such as wrenches, pliers, and screwdrivers, is essential for removing components and gaining access to the cooling system. A pair of safety goggles and gloves should also be part of your toolkit to protect yourself from any potential hazards.
For more advanced diagnostics, a UV dye and blacklight kit can be extremely useful. By adding UV dye to the coolant and running the engine, any leaks will become visible under the blacklight, making it easier to identify the exact location of the problem. With these tools in hand, you’ll be well-equipped to diagnose and fix a coolant leak in your engine, ensuring that your vehicle remains in top condition.
Step-by-Step Guide to Diagnosing a Coolant Leak
Diagnosing a coolant leak involves a systematic approach to identify the source of the problem. Follow these steps to accurately diagnose the issue and determine the best course of action.
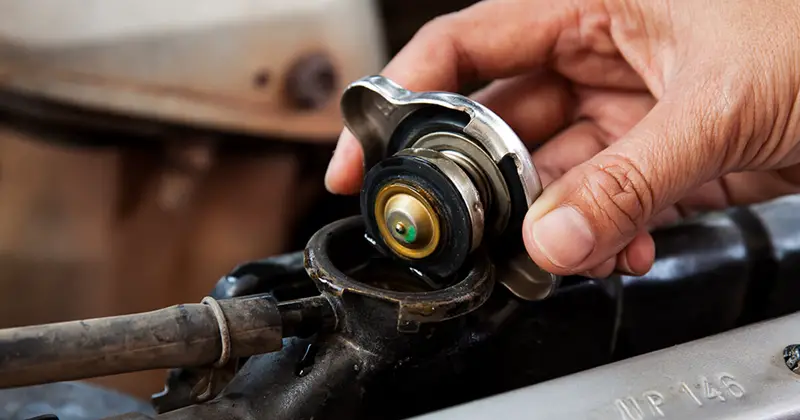
- Inspect the Coolant Level: Begin by checking the coolant level in the radiator and the coolant reservoir. Make sure the engine is cool before removing the radiator cap to avoid injury. If the coolant level is low, top it up and monitor it over the next few days to see if it drops again. A consistent drop in coolant level indicates a leak.
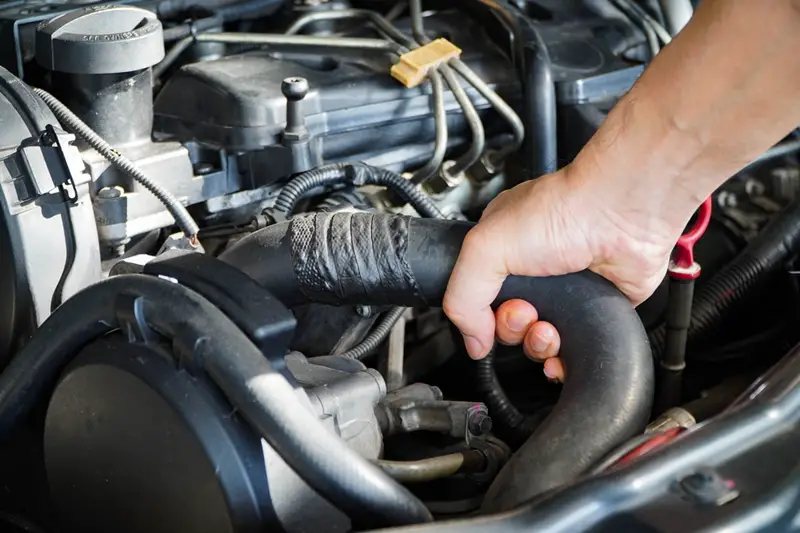
- Check for Visible Leaks: Look for any visible signs of coolant leaks under the vehicle and around the engine bay. Pay close attention to the radiator, hoses, water pump, and heater core. Use a flashlight and inspection mirror to check hard-to-reach areas. If you spot any wet or discolored areas, they could be the source of the leak.
- Use a Cooling System Pressure Tester: Connect the pressure tester to the radiator and pressurize the cooling system to the recommended level. This will help you identify leaks that are not visible when the engine is off. Listen for hissing sounds and look for any signs of coolant escaping.
- Add UV Dye to the Coolant: If you still can’t find the leak, add UV dye to the coolant and run the engine for a few minutes. Then, use a blacklight to inspect the entire cooling system. The UV dye will make any leaks glow under the blacklight, making them easier to spot.
- Inspect the Oil: Check the engine oil for any signs of coolant contamination. If the oil appears milky or foamy, it could indicate a blown head gasket or a cracked engine block. This is a serious issue that requires immediate attention.
By following these steps, you can accurately diagnose the source of a coolant leak and take the necessary steps to fix it.
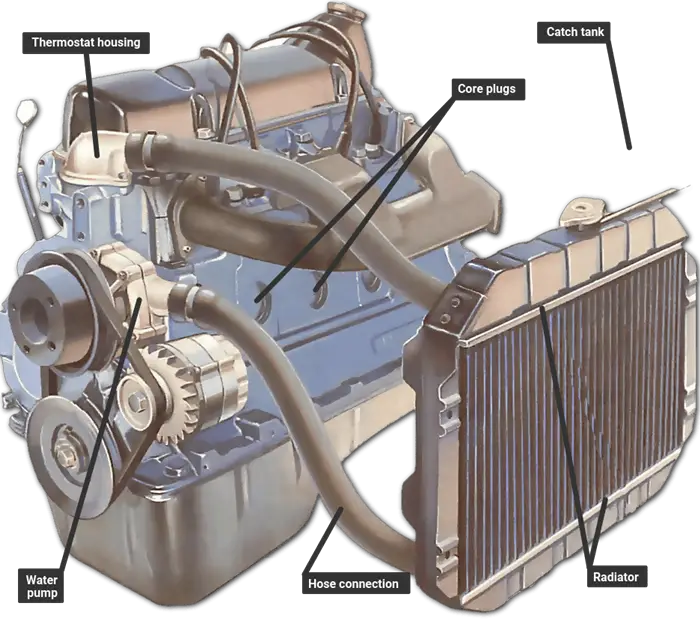
Common Locations for Coolant Leaks in Engines
Coolant leaks can occur in various locations within the engine, and knowing where to look can help you identify the problem quickly. Here are some of the most common locations for coolant leaks in engines.
- Radiator: The radiator is one of the most common sources of coolant leaks. Over time, the radiator can develop cracks or corrosion, leading to leaks. Inspect the radiator for any signs of damage, especially around the seams and the core.
- Hoses: The hoses that carry coolant to and from the engine can also develop leaks. Check for cracks, bulges, or soft spots in the hoses. Pay special attention to the hose clamps, as loose or damaged clamps can cause leaks.
- Water Pump: The water pump circulates coolant throughout the engine, and a failing water pump can cause leaks. Look for any signs of coolant seeping from the water pump or the surrounding area. A leaking water pump may also produce a whining noise.
- Heater Core: The heater core is located inside the dashboard and can develop leaks over time. If you notice a sweet smell inside the cabin or foggy windows, it could indicate a leaking heater core. This can be a challenging area to inspect, so be thorough.
- Head Gasket: A blown head gasket can cause coolant to leak into the engine oil or the combustion chamber. This is a serious issue that requires immediate attention. Look for signs of coolant in the oil or white smoke from the exhaust.
By knowing where to look, you can identify the source of a coolant leak more quickly and take the necessary steps to fix it.
How to Fix a Coolant Leak Inside Engine: DIY Solutions
Fixing a coolant leak inside engine can vary in complexity depending on the source of the leak. Some repairs are simple and can be done at home, while others may require professional assistance. Here are some DIY solutions for a common coolant leak inside engine.
- Radiator Leaks: If you find a small leak in the radiator, you can use a commercial radiator sealant to temporarily fix the problem. Follow the instructions on the product and add it to the coolant. This can seal small cracks and holes, but it’s important to remember that this is only a temporary solution. For a permanent fix, the radiator will need to be repaired or replaced.
- Hose Leaks: If a hose is leaking, you can try tightening the hose clamps or replacing the hose entirely. Make sure to use the correct type of hose for your vehicle and double-check that the clamps are secure. If the hose is severely damaged, it’s best to replace it to prevent future leaks.
- Water Pump Leaks: Replacing a water pump can be a more involved repair, but it’s possible to do it yourself with the right tools and instructions. Start by draining the coolant and removing any components that obstruct access to the water pump. Once you have clear access, remove the old water pump and install the new one, making sure to use a new gasket and sealant if required.
- Heater Core Leaks: Fixing a leaking heater core can be a challenging DIY project, as it often requires removing the dashboard to access the heater core. If you’re comfortable with this level of disassembly, you can replace the heater core yourself. Otherwise, it’s best to seek professional help for this repair.
- Head Gasket Leaks: A blown head gasket is a serious issue that typically requires professional repair. However, if you’re an experienced DIYer, you can attempt to replace the head gasket yourself. This involves removing the cylinder head, cleaning the mating surfaces, and installing a new gasket. Be sure to follow the manufacturer’s torque specifications when reassembling the engine.
By tackling these common coolant leaks yourself, you can save money on repairs and keep your vehicle running smoothly.
When to Seek Professional Help for Coolant Leaks
While many coolant leak inside engine can be addressed with DIY solutions, there are situations where it’s best to seek professional help. Here are some scenarios where professional assistance is recommended.
- Complex Repairs: Some repairs, such as replacing a head gasket or heater core, can be complex and time-consuming. If you’re not comfortable with extensive disassembly or don’t have the necessary tools, it’s best to leave these repairs to a professional mechanic.
- Persistent Leaks: If you’ve attempted to fix a coolant leak inside engine yourself but the problem persists, it’s a sign that there may be an underlying issue that requires professional diagnosis. A mechanic can perform a thorough inspection and identify the root cause of the leak.
- Contaminated Oil: If you find coolant in the engine oil, it’s a serious issue that requires immediate attention. This could indicate a blown head gasket, cracked engine block, or other major problems. A professional mechanic can accurately diagnose the issue and perform the necessary repairs.
- Lack of Experience: If you’re not confident in your ability to diagnose and fix a coolant leak inside engine, it’s best to seek professional help. Attempting a repair without the proper knowledge and experience can lead to further damage and more costly repairs down the road.
By knowing when to seek professional help, you can ensure that your vehicle receives the proper care and avoid potential complications.
Also read: How Long Can Spark Plugs Last? 3 Proven Lifespan Ranges Based on Material Type
Preventative Measures to Avoid Future Coolant Leaks
Taking preventative measures can help you avoid future coolant leak inside engine and keep your engine running smoothly. Here are some tips to prevent coolant leak inside engine.
- Regular Maintenance: Perform regular maintenance on your vehicle, including checking the coolant level and inspecting the cooling system components. Replace worn or damaged hoses, clamps, and seals before they cause leaks.
- Coolant Flush: Regularly flush and replace the coolant according to the manufacturer’s recommendations. This helps prevent corrosion and buildup of contaminants that can damage the cooling system components.
- Use Quality Parts: When replacing cooling system components, use high-quality, OEM or aftermarket parts. Cheap or inferior parts may not last as long and can lead to leaks.
- Monitor Temperature: Keep an eye on the engine temperature gauge and address any signs of overheating immediately. If the engine runs hotter than normal, it can cause damage to the cooling system and lead to leaks.
- Avoid Overfilling: When topping up the coolant, avoid overfilling the reservoir. Overfilling can cause excess pressure in the cooling system and lead to leaks.
By following these preventative measures, you can reduce the risk of coolant leak inside engine and ensure that your vehicle remains in good condition.
The Importance of Regular Engine Maintenance
Regular engine maintenance is crucial for the longevity and performance of your vehicle. By keeping up with routine maintenance tasks, you can prevent issues like coolant leak inside engine and ensure that your engine runs smoothly.
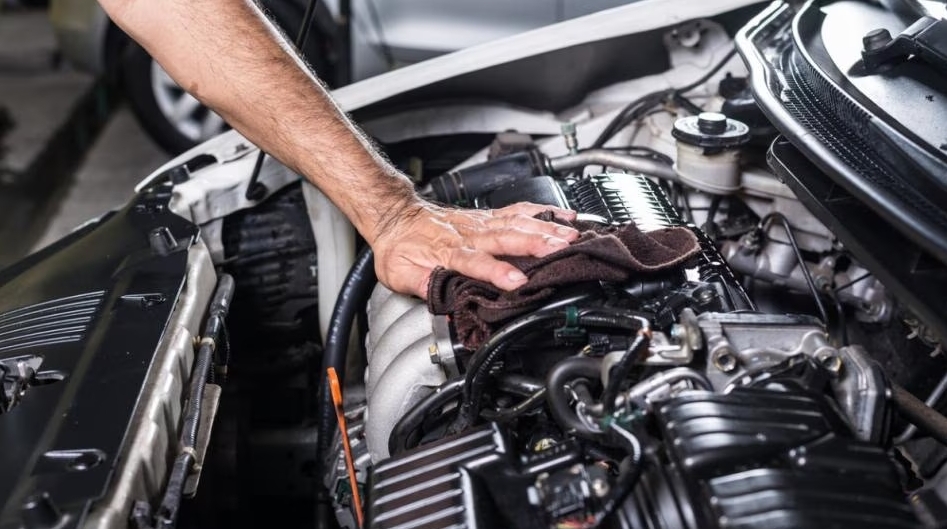
- Scheduled Inspections: Follow the manufacturer’s recommended maintenance schedule for your vehicle. Regular inspections can help identify potential issues before they become major problems. During these inspections, a mechanic can check the cooling system, oil levels, belts, and hoses for any signs of wear or damage.
- Fluid Changes: Regularly change the engine oil, coolant, and other fluids according to the manufacturer’s recommendations. Fresh fluids help keep the engine components lubricated and prevent buildup of contaminants that can lead to corrosion and leaks.
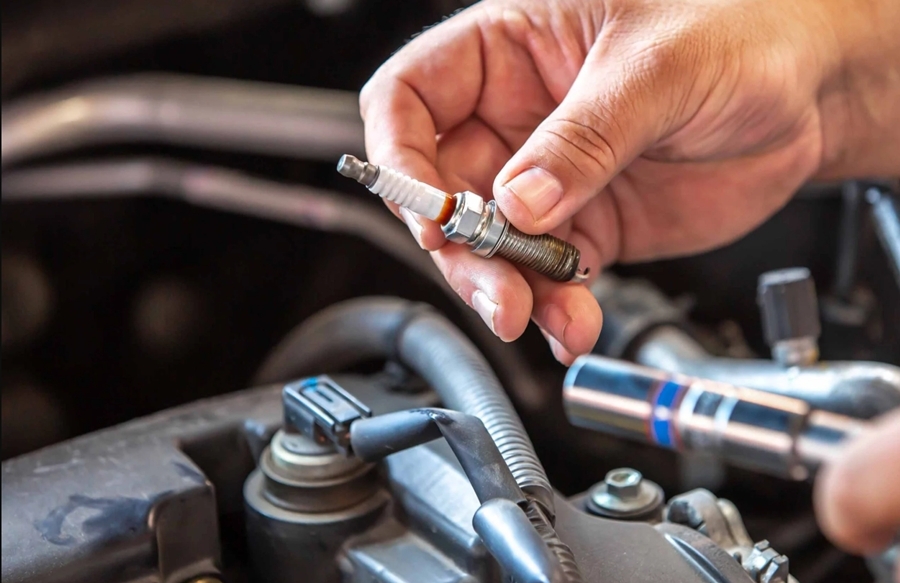
- Tune-Ups: Regular tune-ups, including replacing spark plugs, air filters, and fuel filters, can help maintain engine performance and fuel efficiency. A well-maintained engine is less likely to experience issues like overheating and coolant leak inside engine.
- Drive Responsibly: Avoid aggressive driving habits, such as sudden acceleration and hard braking, which can put additional stress on the engine and cooling system. Drive responsibly to reduce wear and tear on your vehicle.
- Monitor Warning Lights: Pay attention to any warning lights on your dashboard, such as the low coolant light or check engine light. Address any issues promptly to prevent further damage to your engine.
By prioritizing regular engine maintenance, you can extend the life of your vehicle and reduce the risk of issues like coolant leak inside engine.
Need a mechanic? Find one on the Mobile Mechanic Directory
Conclusion: Keeping Your Engine Cool and Efficient
A coolant leak inside your engine is a serious issue that requires prompt attention to prevent further damage. By understanding the causes and consequences of coolant leak inside engine, recognizing the signs and symptoms, and using the right tools for diagnosis, you can identify and address the problem effectively. Whether you choose to tackle the repair yourself or seek professional help, taking action is crucial to maintaining your engine’s health and performance.
Regular maintenance and preventative measures are key to avoiding future coolant leak inside engine and ensuring that your vehicle runs smoothly. By following the tips and guidelines outlined in this article, you can keep your engine cool and efficient, preventing costly repairs and extending the life of your vehicle. Don’t let a coolant leak inside engine derail your driving experience—take charge of your vehicle’s health and enjoy the peace of mind that comes with a well-maintained engine.