Are you noticing strange odors coming from your car vents? Or maybe your vehicle’s heating and cooling system isn’t performing as well as it used to? It might be time to replace your cabin air filter! Whether you’re a first-timer or just need a refresher, this comprehensive guide will walk you through everything you need to know about how to replace your cabin air filter – saving you money and giving you the satisfaction of handling this maintenance task yourself!
Also read: Finding the Best Cabin Air Filter for Your Vehicle: A Complete Guide
This often-overlooked maintenance task is actually one of the easiest DIY jobs you can perform on your vehicle, and it can make a tremendous difference in your driving comfort and health. Did you know that the air inside your car can be up to 6 times more polluted than the air outside? Yikes! That’s where your cabin air filter comes in – it’s your vehicle’s unsung hero, quietly protecting you from dust, pollen, and other airborne nasties.
But like any filter, it can’t do its job forever! I’ve replaced countless cabin air filters over the years, and I’m here to guide you step by step through how to replace your cabin air filter so you can breathe easy on every drive.
Table of Contents

When to Change Your Cabin Air Filter: 6 Warning Signs You Shouldn’t Ignore
How do you know when it’s time for a cabin air filter replacement? Your vehicle will typically give you several noticeable clues that should prompt you to check this often-forgotten component. Knowing how to replace your cabin air filter is only part of the equation — the other part is recognizing when to do it. Here are the key indicators that your cabin filter is due for a change:
1. Reduced Airflow from Vents
Perhaps the most common and obvious sign is noticeably weaker airflow coming from your vents. If you find yourself cranking up the fan speed higher than usual to get the same level of air circulation, a clogged cabin filter is likely the culprit. This happens because the accumulated debris in the filter creates resistance, making it harder for air to pass through into your vehicle’s interior.
2. Unusual or Musty Odors
Does your car smell like a damp basement when you turn on the AC? This musty or moldy smell often indicates that your cabin air filter has become a breeding ground for bacteria, mold, or mildew. A fresh filter will eliminate these odors and provide much cleaner air. This smell is particularly noticeable when you first turn on your climate control system after your car has been sitting for a while.
3. Increased Allergy Symptoms
If you or your passengers suddenly experience more sneezing, coughing, or watery eyes while in the vehicle, your cabin air filter may no longer be effectively trapping allergens. This is especially noticeable during high pollen seasons or when driving in areas with poor air quality. For allergy sufferers, regular cabin filter replacement is even more critical than for the general population.
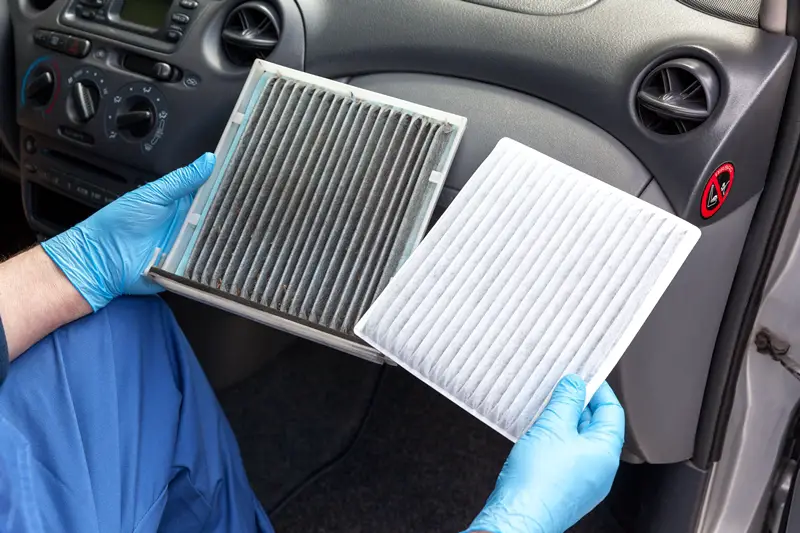
4. Excessive Interior Dust
A properly functioning cabin air filter should trap dust particles before they enter your vehicle’s interior. If you’re noticing more dust accumulating on your dashboard and other surfaces despite regular cleaning, your filter may no longer be doing its job effectively.
5. Foggy or Hazy Windows
When your HVAC system can’t circulate air efficiently due to a clogged filter, you might notice that your windows take longer to defog or defrost. This can be particularly frustrating and potentially dangerous in cold or rainy weather conditions when visibility is already compromised.
6. Replacement Timeline Guidelines
While watching for these symptoms is important, proactive maintenance is even better. Most manufacturers recommend replacing your cabin air filter every 15,000–30,000 miles or every 12–24 months, depending on your driving conditions. If you frequently drive in dusty environments, areas with poor air quality, or during high pollen seasons, you may need to replace your filter more frequently.
If you’re unsure how to replace your cabin air filter, don’t worry — the process is easier than you might think. Later in this guide, we’ll walk you through the exact steps, tools, and tips to get it done right the first time. Consulting your vehicle’s owner’s manual will also give you specific recommendations based on your make and model.
Setting a regular cabin filter replacement schedule can prevent many of the issues described above and ensure that you’re always breathing the cleanest possible air in your vehicle.
Also read: 5 Common Cabin Air Filter Installation Issues and Quick Fixes
Essential Tools and Supplies for DIY Cabin Filter Replacement
The good news about how to replace your cabin air filter is that it typically requires very few tools. Most vehicle owners can complete the job in under 30 minutes with just a few basic supplies — no advanced mechanical skills needed!
Replacement Cabin Air Filter
First and foremost, you’ll need the correct replacement filter for your specific vehicle make, model, and year. Cabin air filters are not universal, and using the wrong one can result in poor fitment, reduced efficiency, or even damage to your HVAC system.
To find the right filter:
- Check your vehicle’s owner’s manual for the specific part number
- Use the filter lookup tool at your local auto parts store
- Look up your vehicle information on the filter manufacturer’s website
- Bring your old filter with you when purchasing a replacement
Knowing how to replace your cabin air filter also means knowing how to select the proper replacement — don’t skip this step!
Basic Hand Tools
In most vehicles, cabin air filter replacement requires minimal tools, typically just:
- A Phillips or flathead screwdriver (for removing access panels or glove compartment hardware)
- Sometimes a socket set for vehicles with more complex access points
- Pliers in rare cases for clip removal
The specific tools will vary by vehicle, but the job is designed to be relatively simple for most models. In fact, some vehicles require no tools at all — the filter may be accessible by simply opening latches or clips by hand. If you’re learning how to replace your cabin air filter for the first time, this is great news — it’s often far easier than most people expect.
Optional Supplies
While not strictly necessary, these additional items can make the job cleaner and more efficient:
- Disposable gloves to keep your hands clean
- A can of compressed air to blow out debris from the filter housing
- A small vacuum with attachment to clean out the filter area
- A microfiber cloth to wipe down surfaces
- A small brush for removing stubborn debris
With these tools and supplies ready, you’ll be fully equipped to tackle this quick and satisfying DIY task. In the next section, we’ll break down the actual process step by step, so you’ll know exactly how to replace your cabin air filter safely and efficiently.
Filter Types and Price ConsiderationsCabin air filters come in various types and price ranges to match different needs:
- Standard Particle Filters: The most basic and affordable option, effective at trapping dust, pollen, and debris ($10–$20).
- Carbon-Activated Filters: These include an extra layer for neutralizing odors and absorbing pollutants ($15–$30).
- HEPA or Premium Filters: Top-tier protection against allergens and microscopic particles, ideal for those with respiratory issues ($25–$50).
- Washable/Reusable Filters: Reusable options that can last much longer with proper care. While the upfront cost is higher, they pay off over time ($40–$100).
When deciding how to replace your cabin air filter, don’t overlook the filter type itself — it can make a big difference in air quality and comfort, especially if you drive in dusty or polluted environments.
How to Replace Your Cabin Air Filter: Easy Step-by-Step Installation Guide
Now that you understand the importance of your cabin air filter and have gathered the necessary supplies, it’s time to learn exactly how to replace your cabin air filter. Don’t worry — this is a straightforward task that even beginner DIYers can handle with confidence.
1. Safety First
Before beginning any vehicle maintenance:
- Ensure your vehicle is parked on a level surface
- Set the parking brake
- Turn off the engine and remove the key
- Allow the engine compartment to cool if you’ve been driving
- Disconnect the battery if working near electrical components (rarely necessary for cabin air filter replacement)
Knowing how to replace your cabin air filter safely is just as important as doing it correctly.
2. Locating Your Cabin Air Filter
The location of your cabin air filter varies by vehicle, but it’s typically found in one of these areas:
- Behind the glove compartment (most common)
- Under the dashboard on the passenger or driver’s side
- Under the hood, near the base of the windshield
- In rare cases, under the center console
If you’re unsure of the location, consult your owner’s manual or search online using your vehicle’s make and model. Learning how to replace your cabin air filter starts with knowing where it lives!
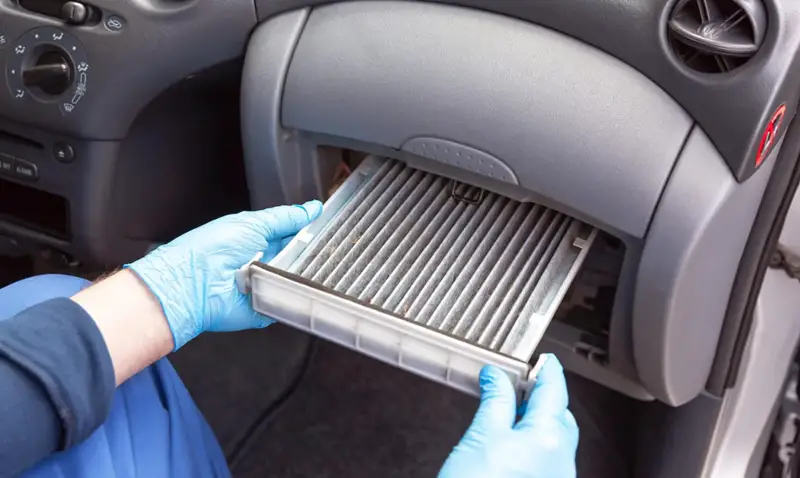
3. Accessing the Filter Housing
Here’s how to access it depending on the location:
Behind the glove compartment:
- Open it fully and locate the limiting tabs or stoppers
- Press the sides inward to release them
- In some vehicles, you may need to remove a few screws
- Once loosened, the glove box will drop down, revealing the filter housing
Under the dashboard:
- Look for a rectangular panel
- Remove any screws or clips holding the cover
- Carefully pull off the cover to access the filter
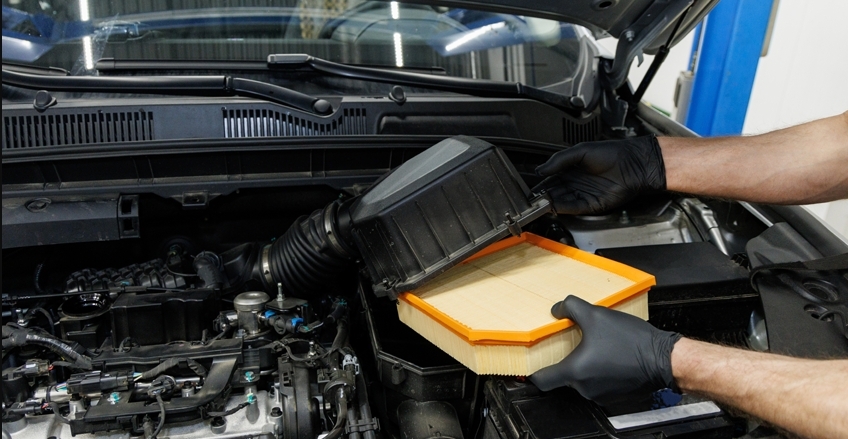
Under the hood:
- Open the hood and locate the plastic filter housing near the windshield base
- Release the clips or screws to open it
No matter where it’s located, this step is a crucial part of learning how to replace your cabin air filter correctly and cleanly.
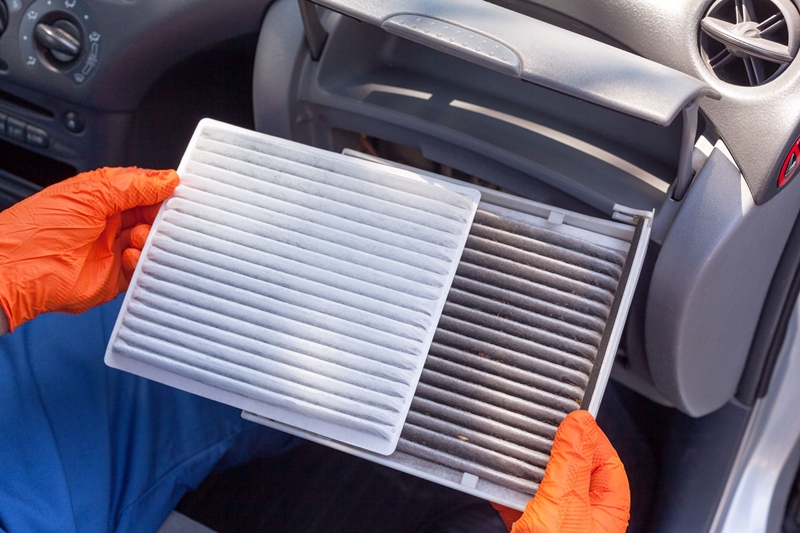
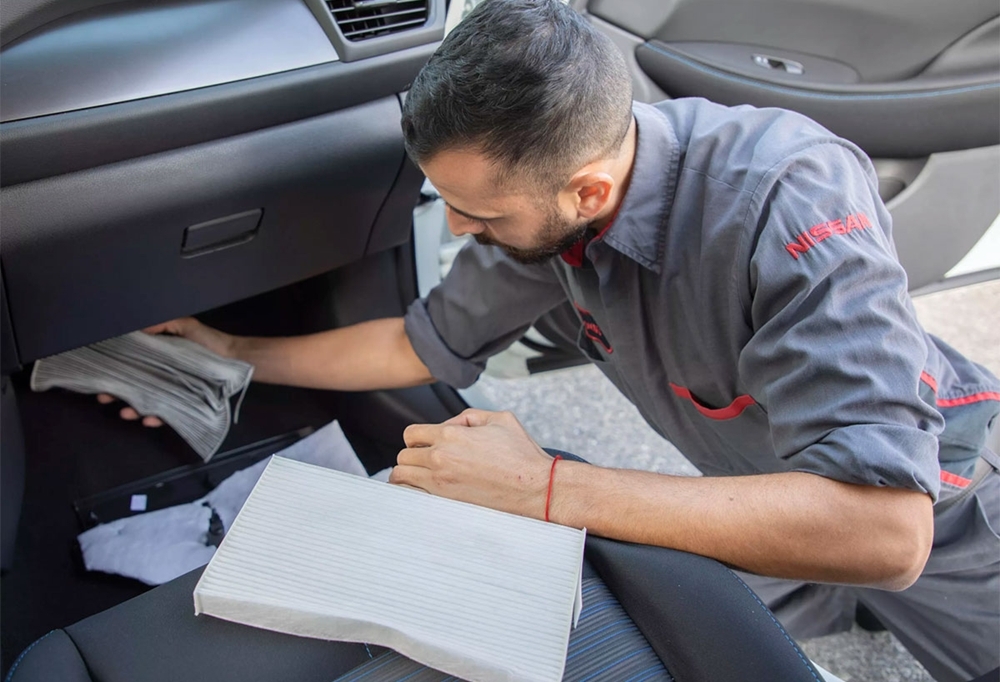
4. Removing the Old Filter
Once you’ve reached the filter:
- Note the orientation of the filter and airflow direction arrows
- Gently slide the old filter out without shaking it
- Avoid spilling dust and debris inside your vehicle
When figuring out how to replace your cabin air filter for the first time, this step might feel a bit messy — but it’s worth it for the clean air ahead!
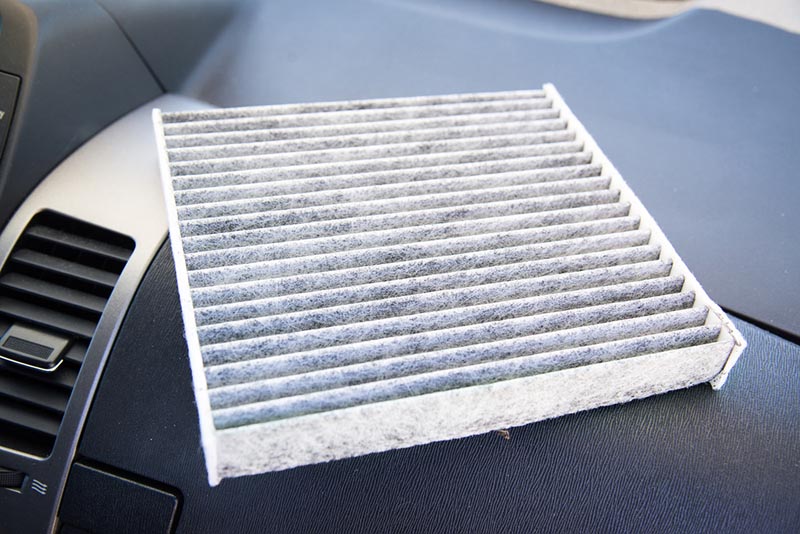
5. Inspecting the Filter Housing
Before inserting the new filter:
- Shine a flashlight into the housing
- Remove leaves, dust, or signs of pests using a vacuum, cloth, or compressed air
- Inspect the housing for cracks or worn seals
Keeping this area clean ensures that your new filter lasts longer and functions efficiently.
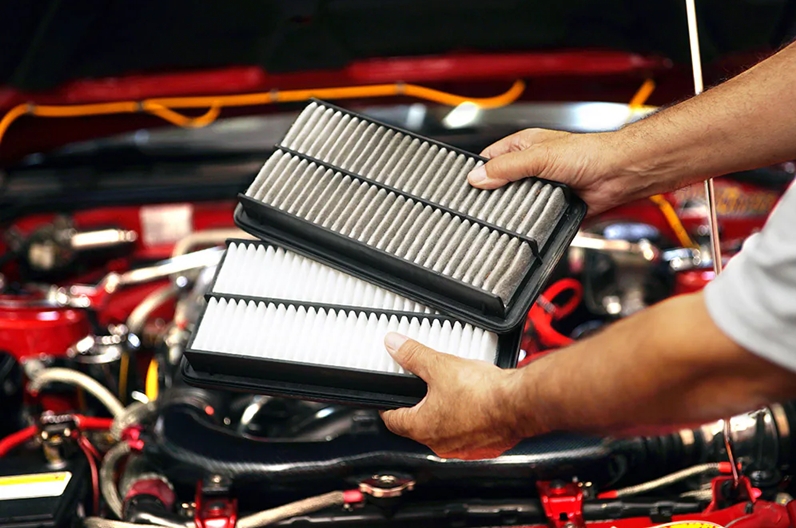
6. Installing the New Filter
This step is where precision matters:
- Locate the airflow direction arrows on the new filter
- Insert it the same way the old one came out
- Slide it in carefully — don’t bend or force it
- Make sure it’s flush and fully seated
Correct orientation is vital. If you’re ever unsure how to replace your cabin air filter for your specific model, checking a quick video or diagram can help.
7. Reassembly and Verification
Time to put everything back:
- Reattach the filter housing cover or reinstall the glove box
- Make sure all screws and clips are secure
- Turn on your HVAC system to verify good airflow
Congratulations! You’ve just completed how to replace your cabin air filter on your own — no mechanic required.
Make a note of the date and mileage so you’ll know when it’s time to do it again. Most filters need replacement every 15,000–30,000 miles, depending on driving conditions.
Knowing how to replace your cabin air filter not only saves you money but also empowers you to take better control of your vehicle’s maintenance and air quality. It’s one of the quickest ways to breathe easier — literally and financially.
Tips for Success
As you troubleshoot, don’t forget:
- Always match your filter’s size and shape exactly to your vehicle’s specifications.
- Pay close attention to airflow direction arrows — placing the filter backward is a common mistake.
- After installation, run your HVAC system to verify smooth airflow and double-check for any vibrations or rattles.
Even if your first few attempts come with minor frustrations, practice and preparation make all the difference. By working through these common challenges, you’ll gain confidence not just in how to replace your cabin air filter, but in tackling other vehicle maintenance tasks as well.
When to Seek the Help of a Mechanic
Learning how to replace your cabin air filter is a valuable skill for any car owner, but sometimes calling in a professional is the smarter move. While most replacements are quick and easy, certain vehicle designs or unexpected issues can make the job more complex than anticipated.
You should consider professional help if:
- You can’t locate the filter even after checking your owner’s manual and online tutorials
- Access requires removing parts of the dashboard, center console, or HVAC system
- You notice visible damage to HVAC components during filter removal
- Your cabin still smells musty or the airflow remains weak after a fresh filter is installed
- You drive a luxury, electric, or hybrid vehicle with specialized or dual filtration systems
Knowing how to replace your cabin air filter is one thing, but recognizing when a mechanic’s expertise is needed can save time and prevent costly mistakes.
Common Mistakes to Avoid During Installation
Even if you’ve studied how to replace your cabin air filter carefully, there are a few common errors that can slip through and compromise your results. Avoiding these pitfalls will help ensure your filter works as intended and that your HVAC system remains in top shape.
Watch out for these common mistakes:
- Installing the filter backward: Always follow the airflow arrows printed on the filter’s edge. Installing it incorrectly can restrict airflow and reduce filtration.
- Forcing the filter into place: If it doesn’t slide in easily, stop and double-check the orientation. Forcing it may damage the filter media or the housing.
- Leaving on protective packaging: Some new filters come wrapped in plastic. Make sure to remove any outer wrap before installation.
- Using the wrong filter size: Filters that are too small or too large can create gaps that let unfiltered air bypass the system.
- Damaging trim or fasteners: Be gentle when removing or reinstalling panels, clips, or the glove box. Some plastic components become brittle over time.
- Over-tightening screws: Reassembling access panels too tightly can crack plastic and cause long-term issues.
Avoiding these missteps is a key part of mastering how to replace your cabin air filter effectively and safely.
Need a mechanic? Find one on the Mobile Mechanic Directory

Final Thoughts on Cabin Air Filter Maintenance
Learning how to replace your cabin air filter is one of the easiest and most effective DIY tasks you can do for your vehicle. In just 15 minutes, you can improve air quality, boost HVAC performance, and save money.
Regular replacement offers clear benefits:
- Cleaner, healthier air
- Better HVAC efficiency
- Longer system lifespan
- Significant cost savings over time
Now that you know how to replace your cabin air filter, don’t wait for musty odors or weak airflow to act. Make filter checks part of your oil change routine and enjoy fresher air every drive.